DRAG DROP -
You are an app builder for a medical office. The medical office uses activities to book appointments and business process flows to track patient status. The cleaning staff wants the app to connect directly to a Microsoft Excel workbook to track cleaning tasks. The office does not have access to reporting tools including
Power BI.
You need to create apps for the following groups of users. Apps must not require customizations or the use of additional products.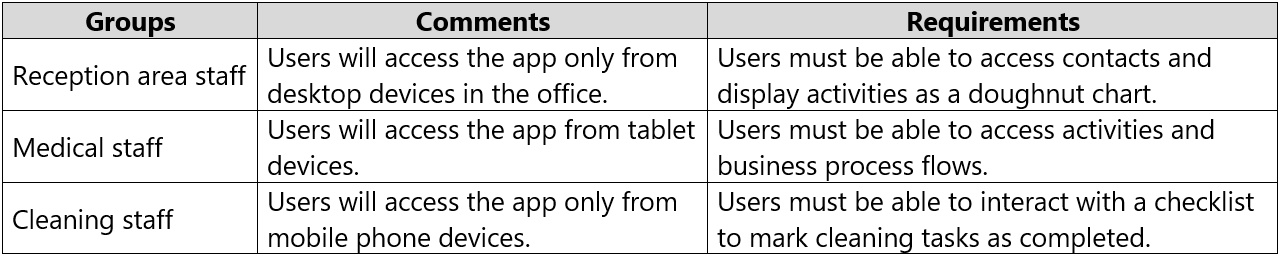
Which type of app should you build for each group? To answer, drag the appropriate app types to the correct groups. Each app type may be used once, more than once, or not at all. You may need to drag the split bar between panes or scroll to view content.
NOTE: Each correct selection is worth one point.
Select and Place: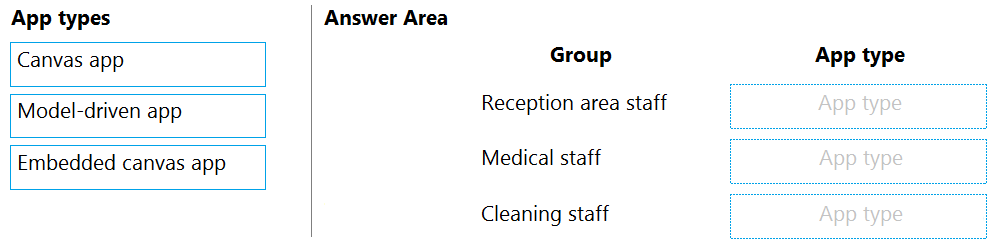
Answer:
Reference:
https://docs.microsoft.com/en-us/powerapps/maker/model-driven-apps/embedded-canvas-app-guidelines https://global.hitachi-solutions.com/blog/canvas-vs-model-driven-apps
DRAG DROP -
You plan to create apps for a company.
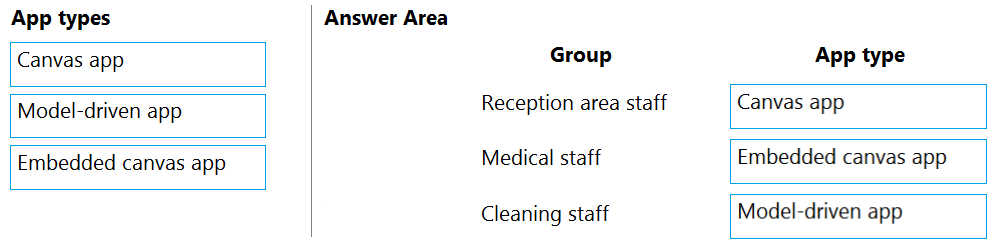
You need to identify the Power Platform tools required.
What should you use? To answer, drag the appropriate tools to the correct requirements. Each tool may be used once, more than once, or not at all. You may need to drag the split bar between panes or scroll to view content.
NOTE: Each correct selection is worth one point.
Select and Place:
Answer:
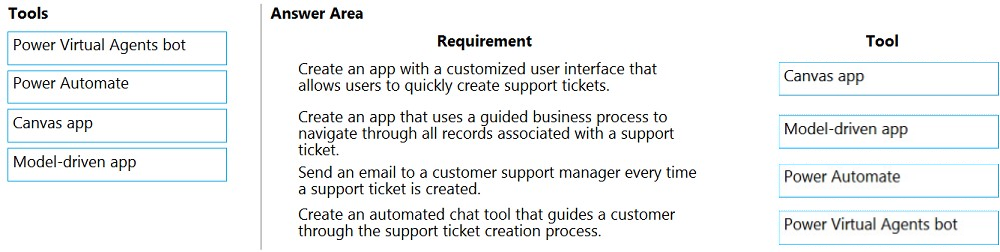
Box 1: Canvas App -
Box 2: Model-driven app -
Model-driven app design is a component-focused approach to app development. Model-driven app design doesn't require code and the apps you make can be simple or very complex. Unlike canvas app development where the designer has complete control over app layout, with model-driven apps much of the layout is determined for you and largely designated by the components you add to the app.
Box 3: Power Automate -
Power Automate is a service that helps you create automated workflows between your favorite apps and services to synchronize files, get notifications, collect data, and more.
Box 4: Power Virtual Agents bot -
When you create bots with Power Virtual Agents, you author and edit topics.
Topics are discrete conversation paths that, when used together within a single bot, allow for users to have a conversation with a bot that feels natural and flows appropriately.
Creating a bot with Power Virtual Agents is easy to do with the no-code authoring canvas, and there are a number of ways you can manage how topics interact, how you want the conversation to flow, and what it should feel like.
Reference:
https://docs.microsoft.com/en-us/power-virtual-agents/authoring-fundamentals https://docs.microsoft.com/en-us/power-automate
A company uses data loss prevention (DLP) policies. You have a Power Automate flow that posts Twitter mentions into a Microsoft SharePoint list.
You are not able to activate the flow.
You need to troubleshoot the issue.
What are two possible reasons why you cannot activate the flow? Each correct answer presents a complete solution.
NOTE: Each correct selection is worth one point.
Answer:
BD
D: DLP policies are created in the Power Platform admin center. They affect Power Platform canvas apps and Power Automate flows. To create a DLP policy, you need to be a tenant admin or have the Environment Admin role.
B: This table describes how the DLP policy you created affects data connections in apps and flows.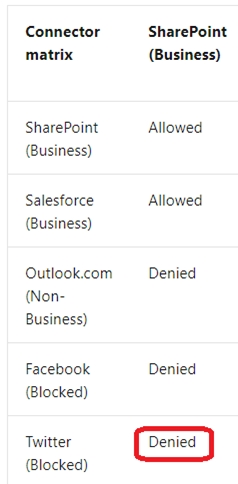
Note: Any connector that resides in the Non-Business data groupג€"such as Outlook.comג€"won't share data with apps and flows by using SharePoint or
Salesforce connectors. Facebook and Twitter connectors are altogether blocked from being used in any app or flow in non-test environments such as production or default environments.
Reference:
https://docs.microsoft.com/en-us/power-platform/admin/wp-data-loss-prevention
You are an app maker. You are creating a canvas app.
You do not have access to Power BI.
You need to add charts to the app.
Which three chart types can you add directly to the canvas app? Each correct answer presents a complete solution.
NOTE: Each correct selection is worth one point.
Answer:
ADE
You can use line charts, pie charts, and bar charts to display your data in a canvas app.
Add a bar chart to display your data:
1. On the Home tab, add a screen.
2. On the Insert tab, select Charts, and then select Column Chart.
Reference:
https://docs.microsoft.com/en-us/powerapps/maker/canvas-apps/use-line-pie-bar-chart
Note: This question is part of a series of questions that present the same scenario. Each question in the series contains a unique solution that might meet the stated goals. Some question sets might have more than one correct solution, while others might not have a correct solution.
After you answer a question in this section, you will NOT be able to return to it. As a result, these questions will not appear in the review screen.
You are creating a canvas app that displays a list of accounts.
Users must be able to select an account and view details for the account. The app must include a feature that brings the user back to the list of accounts.
You add a blank screen named Screen_Accounts and add a gallery named Gallery_Accounts to the screen. You set the data source of Gallery_Accounts to
Accounts and add another blank screen named Screen_AccountDetail.
You need to complete the app.
Solution:
✑ Add an edit form to Screen_AccountDetail and set the Default Mode of the form to View.
✑ Set the OnSelect property of Gallery_Accounts to Navigate(Screen_AccountDetail).
✑ Set the data source of the form to Accounts.
✑ Set the Item property of the form to Selected.
✑ Add a back icon on Screen_AccountDetail and set its OnSelect property to Navigate(Screen_Accounts).
Does the solution meet the goal?
Answer:
A
View, edit, or create an item, save the contents, and reset the controls in an Edit form control.
FormMode.View: The form is populated with an existing record but the user cannot modify the values of the fields.
This function is often invoked from the OnSelect formula of a Button or Image control.
Reference:
https://docs.microsoft.com/en-us/powerapps/maker/canvas-apps/functions/function-form
Note: This question is part of a series of questions that present the same scenario. Each question in the series contains a unique solution that might meet the stated goals. Some question sets might have more than one correct solution, while others might not have a correct solution.
After you answer a question in this section, you will NOT be able to return to it. As a result, these questions will not appear in the review screen.
You are creating a canvas app that displays a list of accounts.
Users must be able to select an account and view details for the account. The app must include a feature that brings the user back to the list of accounts.
You add a blank screen named Screen_Accounts and add a gallery named Gallery_Accounts to the screen. You set the data source of Gallery_Accounts to
Accounts and add another blank screen named Screen_AccountDetail.
You need to complete the app.
Solution:
✑ Add an edit form to Screen_AccountDetail and set the Default Mode of the form to New
✑ Set the OnSelect property of Gallery_Accounts to Navigate(Screen_AccountDetail).
✑ Set the data source of the form to Accounts.
✑ Set the Item property of the form to Selected.
✑ Add a back icon on Screen_AccountDetail and set its OnSelect property to Navigate(Screen_Accounts).
Does the solution meet the goal?
Answer:
B
FormMode.New: the form is populated with default values and the user can modify the values of the fields. Once complete, the user can add the record to the data source.
Reference:
https://docs.microsoft.com/en-us/powerapps/maker/canvas-apps/functions/function-form
Note: This question is part of a series of questions that present the same scenario. Each question in the series contains a unique solution that might meet the stated goals. Some question sets might have more than one correct solution, while others might not have a correct solution.
After you answer a question in this section, you will NOT be able to return to it. As a result, these questions will not appear in the review screen.
You are creating a canvas app that displays a list of accounts.
Users must be able to select an account and view details for the account. The app must include a feature that brings the user back to the list of accounts.
You add a blank screen named Screen_Accounts and add a gallery named Gallery_Accounts to the screen. You set the data source of Gallery_Accounts to
Accounts and add another blank screen named Screen_AccountDetail.
You need to complete the app.
Solution:
✑ Add a display form to Screen_AccountDetail.
✑ Set the OnSelect property of Gallery_Accounts to Navigate(Screen_AccountDetail).
✑ Set the data source of the form to Accounts.
✑ Set the Item property of the form to Selected.
✑ Add a back icon on Screen_AccountDetail and set its OnSelect property to Navigate(Screen_Accounts).
Does the solution meet the goal?
Answer:
A
If you add a Display form control, the user can display all fields of a record or only the fields that you specify.
Reference:
https://docs.microsoft.com/en-us/powerapps/maker/canvas-apps/controls/control-form-detail
DRAG DROP -
You are an app maker for a college. You create an app for student enrollment. The app captures the education level of the applicants.
The education level at the time of enrollment is an option set is in the student entity. The entity includes three levels:
✑ High school
✑ College
✑ Bachelor
You must split the College option into two option sets:
✑ College `" 1 Year
✑ College `" 2 years
The split must not impact existing data.
You need to create the two option sets.
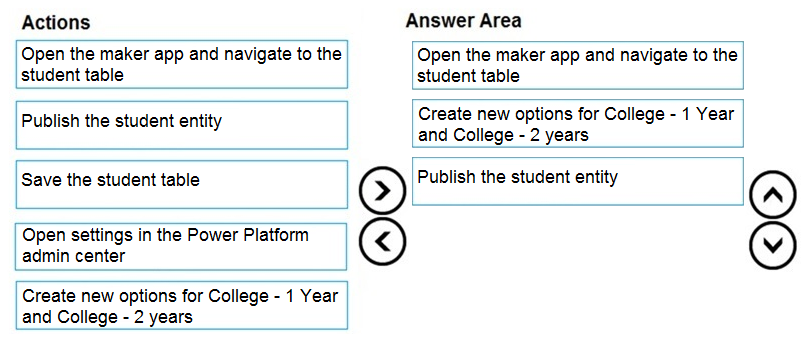
Which three actions should you perform in sequence? To answer, move the appropriate actions from the list of actions to the answer area and arrange them in the correct order.
Select and Place: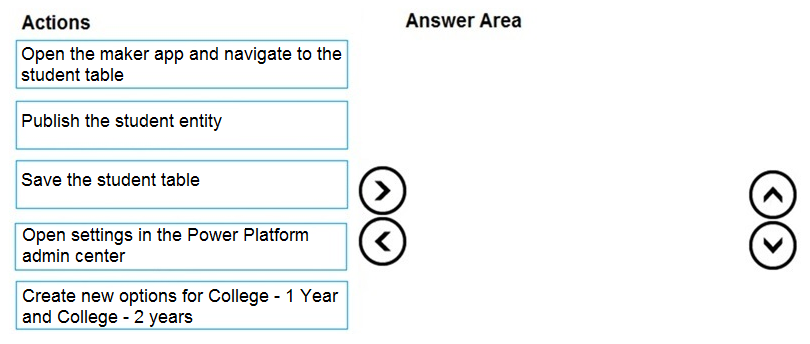
Answer:
You are developing a canvas app to monitor time. The app includes a Text Input control named TIC1 and a Timer control named TIM1.
You need to set TIM1 to a default value.
What should you do?
Answer:
B
DRAG DROP -
You have an existing Power Apps environment.
You need to create a Microsoft Dataverse database for the environment.
Which three actions should you perform in sequence? To answer, move the appropriate actions from the list of actions to the answer area and arrange them in the correct order.
Select and Place: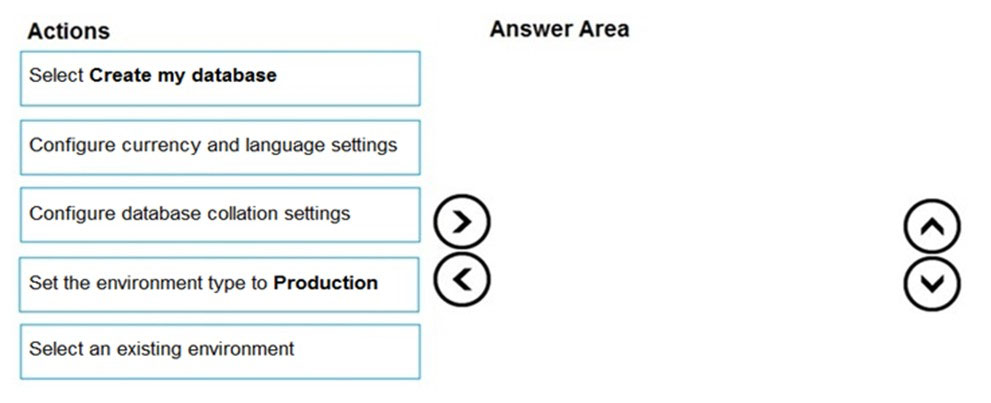
Answer:
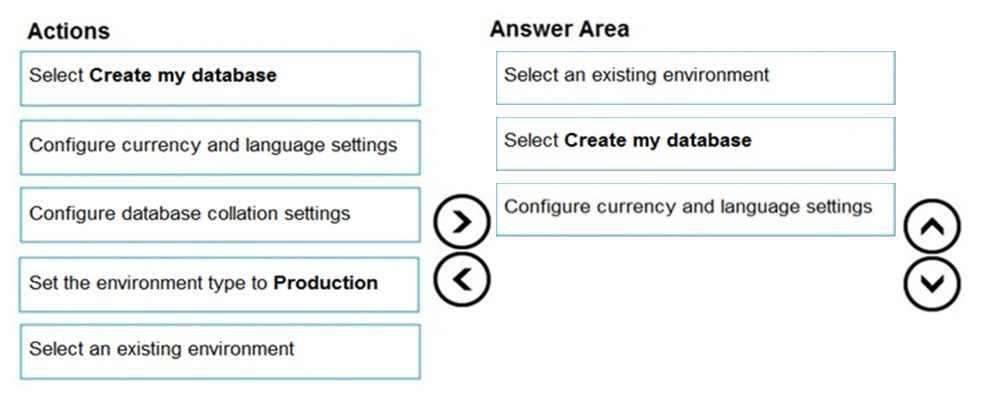
Step 1: Select an existing environment
Add a database in the admin center:
1. In the admin center, in the left navigation pane, select Environments.
2. Select the environment to which you want to add the database.
Step 2: Select Create my database
3. Select + Add database
Step 3: Configure currency and language settings
4. Enter the following, and then select Add.
Reference:
https://docs.microsoft.com/en-us/power-platform/admin/create-database