You have a hybrid deployment between a Microsoft Exchange Online tenant and an on-premises Exchange Server 2019 organization.
Users report that emails sent from Exchange Online mailboxes to the on-premises Exchange Server mailboxes are undelivered.
You need to review the non-delivery report (NDR) for each undelivered email.
What should you use?
Answer:
A
Reference:
https://docs.microsoft.com/en-us/exchange/monitoring/trace-an-email-message/message-trace-faq
DRAG DROP -
You plan to migrate to Microsoft Exchange Online. The solution must meet the following requirements.
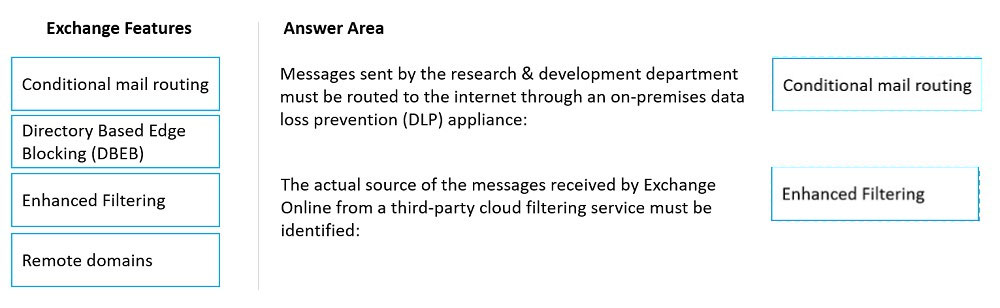
✑ Messages sent by the research & development department at your company must be routed to the internet through an on-premises data loss prevention (DLP) appliance.
✑ The actual source of the messages received by Exchange Online from a third-party cloud filtering service must be identified.
What features should you use to meet the requirements? To answer, drag the appropriate options to the correct requirements. Each option may be used once, more than once, or not at all. You may need to drag the split bar between panes or scroll to view content.
NOTE: Each correct selection is worth one point.
Select and Place: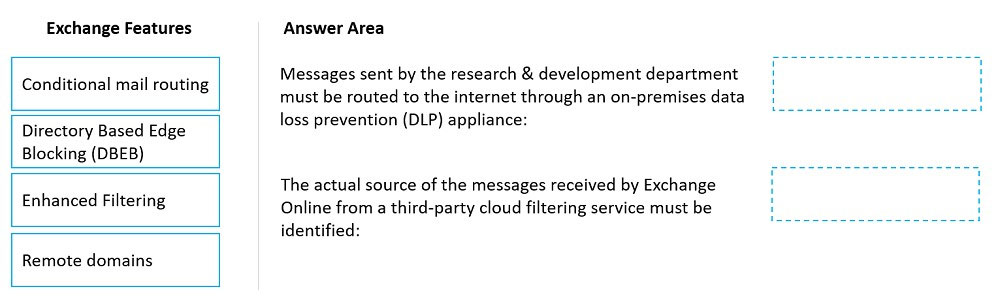
Answer:
Reference:
https://docs.microsoft.com/en-us/exchange/mail-flow-best-practices/use-connectors-to-configure-mail-flow/conditional-mail-routing https://docs.microsoft.com/en-us/exchange/mail-flow-best-practices/use-connectors-to-configure-mail-flow/enhanced-filtering-for-connectors
SIMULATION -
Please wait while the virtual machine loads. Once loaded, you may proceed to the lab section. This may take a few minutes, and the wait time will not be deducted from your overall test time.
When the Next button is available, click it to access the lab section. In this section, you will perform a set of tasks in a live environment. While most functionality will be available to you as it would be in a live environment, some functionality (e.g., copy and paste, ability to navigate to external websites) will not be possible by design.
Scoring is based on the outcome of performing the tasks stated in the lab. In other words, it doesn't matter how you accomplish the task, if you successfully perform it, you will earn credit for that task.
Labs are not timed separately, and this exam may have more than one lab that you must complete. You can use as much time as you would like to complete each lab. But, you should manage your time appropriately to ensure that you are able to complete the lab(s) and all other sections of the exam in the time provided.
Please note that once you submit your work by clicking the Next button within a lab, you will NOT be able to return to the lab.
Use the following login credentials as needed:
To enter your username, place your cursor in the Sign in box and click on the username below.
To enter your password, place your cursor in the Enter password box and click on the password below.
Microsoft 365 Username: [email protected]
Microsoft 365 Password: xxxxxx -
If the Microsoft 365 portal does not load successfully in the browser, press CTRL-K to reload the portal in a new browser tab.
The following information is for technical support purposes only.
Lab Instance: XXXXXX -
You need to prevent users in your company from sending out-of-office replies to users who use an email address suffix of @contoso.com. The solution must NOT use mail flow rules.
To complete this task, sign in to the Exchange admin center.
Answer:
See explanation below.
1. In the Exchange admin center, go to Mail flow > Remote domains.
2. Click + Add a remote domain. The Name the domain screen appears.
3. In the Name text box, enter a descriptive name for the domain.
4. In the Remote Domain text box, enter the full domain name. Use the wildcard character (*) for all subdomains of a specified domain, for example,
*.contoso.com.
5. Click Next. The Email reply types screen appears.
6. Define the following settings:
- In the Out of Office reply types section, specify which type of out-of-office replies should be sent to people at this domain.
- In the Automatic replies section, specify whether you want to allow automatic replies, automatic forwarding, or both.
7. Click Next. The Message reporting screen appears.
8. Specify whether you want to allow delivery reports and non-delivery reports by checking the respective check boxes.
9. Click Next. The Text and character set screen appears.
10.Define the following settings:
- In the Use Rich-text format pane, specify whether to follow each user's message settings, or whether to always or never preserve RTF formatting.
Selecting Never means that RTF messages are sent as plain text or HTML.
- In the Supported Character Set pane, specify which character set to use (if the message doesn't specify the character set) by choosing from the MIME character set or Non-MIME character set drop-down list.
11.Click Next. The Review screen appears.
12.Review the remote domain settings, and click Save.
Reference:
https://docs.microsoft.com/en-us/exchange/mail-flow-best-practices/remote-domains/manage-remote-domains https://docs.microsoft.com/en-us/exchange/troubleshoot/email-delivery/understand-troubleshoot-oof-replies
SIMULATION -
Please wait while the virtual machine loads. Once loaded, you may proceed to the lab section. This may take a few minutes, and the wait time will not be deducted from your overall test time.
When the Next button is available, click it to access the lab section. In this section, you will perform a set of tasks in a live environment. While most functionality will be available to you as it would be in a live environment, some functionality (e.g., copy and paste, ability to navigate to external websites) will not be possible by design.
Scoring is based on the outcome of performing the tasks stated in the lab. In other words, it doesn't matter how you accomplish the task, if you successfully perform it, you will earn credit for that task.
Labs are not timed separately, and this exam may have more than one lab that you must complete. You can use as much time as you would like to complete each lab. But, you should manage your time appropriately to ensure that you are able to complete the lab(s) and all other sections of the exam in the time provided.
Please note that once you submit your work by clicking the Next button within a lab, you will NOT be able to return to the lab.
Use the following login credentials as needed:
To enter your username, place your cursor in the Sign in box and click on the username below.
To enter your password, place your cursor in the Enter password box and click on the password below.
Microsoft 365 Username: [email protected]
Microsoft 365 Password: xxxxxx -
If the Microsoft 365 portal does not load successfully in the browser, press CTRL-K to reload the portal in a new browser tab.
The following information is for technical support purposes only.
Lab Instance: XXXXXX -
Another administrator at contoso.com plans to deploy an SMTP smart host that uses an IP address of 131.107.2.200.
You need to prepare a solution to route all emails sent to users in the @contoso.com domain from your organization by using the SMTP host. The solution must have a status set to Off until the administrator deploys the smart host.
To complete this task, sign in to the Exchange admin center.
Answer:
See explanation below.
+
1. In the EAC, navigate to Mail flow > Send connectors, and then click Add
. This starts the New Send connector wizard.
2. On the first page, enter the following information:
- Name: Enter a descriptive name for the Send connector, for example, Smart host to Internet.
- Type: Select a descriptive value. For example, Internet or Custom.
When you're finished, click Next.
+
3. On the next page, select Route mail through smart hosts, and then click Add
. In the Add smart host dialog box that appears, identify the smart host by using one of the following values:
- IP address: For example, 192.168.3.2.
- Fully qualified domain name (FQDN): For example, securitydevice01.contoso.com. Note that the Exchange source servers for the Send connector must be able to resolve the smart host in DNS by using this FQDN.
When you're finished, click Save.
4. You can enter multiple smart hosts by repeating Step 3. When you're finished, click Next.
5. On the next page, in the Route mail through smart hosts section, select the authentication method that's required by the smart host. Valid values are: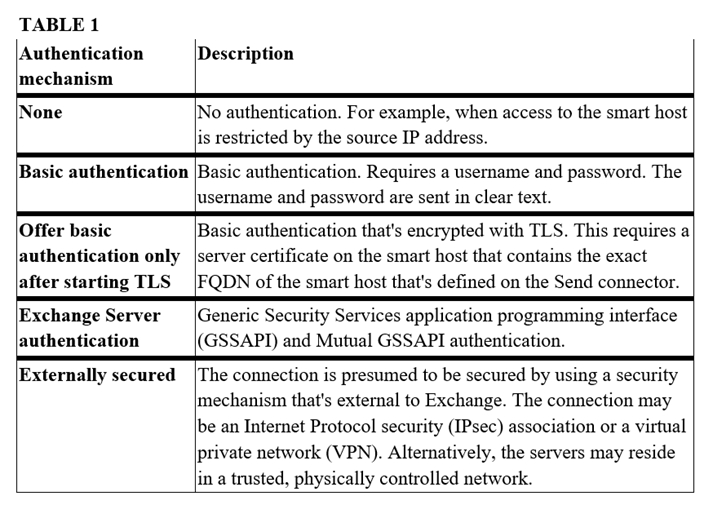
6. When you're finished, click Next.
+
7. On the next page, in the Address space section, click Add
. In the Add domain dialog box that appears, enter the following information:
- Type: Verify SMTP is entered.
- Fully Qualified Domain Name (FQDN): Enter an asterisk (*) to indicate the Send connector applies to messages addressed to all external domains.
Alternatively, you can enter a specific external domain (for example, contoso.com), or a domain and all subdomains (for example, *.contoso.com).
- Cost: Verify 1 is entered. A lower value indicates a more preferred route for the domains you specified.
When you're finished, click Save.
8. Back on the previous page, the Scoped send connector setting is important if your organization has Exchange servers installed in multiple Active Directory sites:
- If you don't select Scoped send connector, the connector is usable by all transport servers (Exchange 2013 or later Mailbox servers and Exchange 2010
Hub Transport servers) in the entire Active Directory forest. This is the default value.
- If you select Scoped send connector, the connector is only usable by other transport servers in the same Active Directory site.
When you're finished, click Next.
+
9. On the next page, in the Source server section, click Add
. In the Select a Server dialog box that appears, select one or more Mailbox servers that you want to use to send outbound mail to the smart host. If you have multiple Mailbox servers in your environment, select the ones that can route mail to the smart host.
If you have only one Mailbox server, select that one. After you've selected at least one Mailbox server, click Add, click OK, and then click Finish.
After you create the Send connector, it appears in the Send connector list.
From the Send connector list, you can turn the connector on or off.
Reference:
https://docs.microsoft.com/en-us/exchange/mail-flow/connectors/outbound-smart-host-routing?view=exchserver-2019#how-do-you-know-this-worked
SIMULATION -
Please wait while the virtual machine loads. Once loaded, you may proceed to the lab section. This may take a few minutes, and the wait time will not be deducted from your overall test time.
When the Next button is available, click it to access the lab section. In this section, you will perform a set of tasks in a live environment. While most functionality will be available to you as it would be in a live environment, some functionality (e.g., copy and paste, ability to navigate to external websites) will not be possible by design.
Scoring is based on the outcome of performing the tasks stated in the lab. In other words, it doesn't matter how you accomplish the task, if you successfully perform it, you will earn credit for that task.
Labs are not timed separately, and this exam may have more than one lab that you must complete. You can use as much time as you would like to complete each lab. But, you should manage your time appropriately to ensure that you are able to complete the lab(s) and all other sections of the exam in the time provided.
Please note that once you submit your work by clicking the Next button within a lab, you will NOT be able to return to the lab.
Use the following login credentials as needed:
To enter your username, place your cursor in the Sign in box and click on the username below.
To enter your password, place your cursor in the Enter password box and click on the password below.
Microsoft 365 Username: [email protected]
Microsoft 365 Password: xxxxxx -
If the Microsoft 365 portal does not load successfully in the browser, press CTRL-K to reload the portal in a new browser tab.
The following information is for technical support purposes only.
Lab Instance: XXXXXX -
Users report that email disclaimers are no longer being appended to email messages sent to external recipients.
You need to ensure that all email sent to external recipients contains your corporate disclaimer.
To complete this task, sign in to the Microsoft 365 admin center.
Answer:
See explanation below.
1. In the Microsoft 365 admin center, choose Admin centers > Exchange.
2. Open the EAC and go to Mail flow > Rules.
3. Click Add
, and then click Apply disclaimers.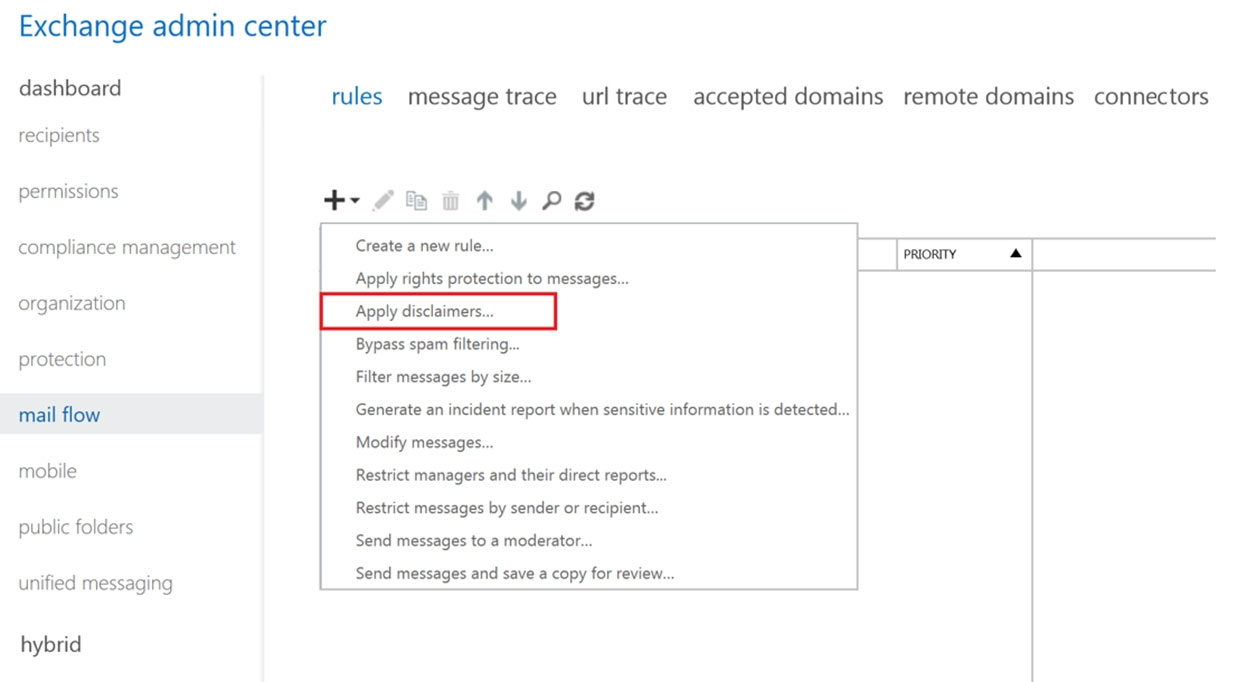
4. In the New rule window that appears, enter a unique name the rule.
5. In the Apply this rule if box, select the conditions for displaying the disclaimer. For example, select The recipient is located condition, and then select Outside the organization. If you want this rule to apply to every message that enters or leaves your organization, select [Apply to all messages].
6. Next to the Do the following box, select Enter text to enter the text of your disclaimer.
7. Click Select one, and select one of the Fallback options if the disclaimer can't be added.
8. Specify the audit severity level to assign the severity level that appears in the message log.
9. Select the mode for the rule. Select Enforce to turn on the disclaimer immediately, or select Test without Policy Tips to put a message in the message tracking log instead of adding the disclaimer.
10.If you have additional conditions or exceptions that you want to add, select More options at the bottom of the page, which will show additional settings. For example, to add the exception that prevents multiple disclaimers being added in an email conversation, select Add exception and then select The subject or body > Subject or body matches these text patterns, and then specify the words or phrases in your disclaimer. Or, to put your disclaimer at the top of the email message instead of the bottom, in Do the following, select Apply a disclaimer to the message > prepend a disclaimer.
11. When you're finished, click Save.
Reference:
https://docs.microsoft.com/en-us/exchange/security-and-compliance/mail-flow-rules/disclaimers-signatures-footers-or-headers
SIMULATION -
Please wait while the virtual machine loads. Once loaded, you may proceed to the lab section. This may take a few minutes, and the wait time will not be deducted from your overall test time.
When the Next button is available, click it to access the lab section. In this section, you will perform a set of tasks in a live environment. While most functionality will be available to you as it would be in a live environment, some functionality (e.g., copy and paste, ability to navigate to external websites) will not be possible by design.
Scoring is based on the outcome of performing the tasks stated in the lab. In other words, it doesn't matter how you accomplish the task, if you successfully perform it, you will earn credit for that task.
Labs are not timed separately, and this exam may have more than one lab that you must complete. You can use as much time as you would like to complete each lab. But, you should manage your time appropriately to ensure that you are able to complete the lab(s) and all other sections of the exam in the time provided.
Please note that once you submit your work by clicking the Next button within a lab, you will NOT be able to return to the lab.
Use the following login credentials as needed:
To enter your username, place your cursor in the Sign in box and click on the username below.
To enter your password, place your cursor in the Enter password box and click on the password below.
Microsoft 365 Username: [email protected]
Microsoft 365 Password: xxxxxx -
If the Microsoft 365 portal does not load successfully in the browser, press CTRL-K to reload the portal in a new browser tab.
The following information is for technical support purposes only.
Lab Instance: XXXXXX -
You need to ensure that a user named Lee Gu can view all the Exchange Online configurations of your organization. The solution must use the principle of least privilege.
To complete this task, sign in to the Microsoft 365 admin center.
Answer:
See explanation below.
1. Open the Microsoft 365 administration centre
This can be done at: https://admin.microsoft.com
2. Create a new user
Please enter a first name -
Last name -
Display name -
Username -
3. Add the necessary licence
For admin roles you sometimes need a licence. Especially in the security stack within Microsoft 365.
4. Add the Global Reader role via Roles
You can give multiple roles to the person you want.
Reference:
https://365tips.be/en/how-to-create-a-global-reader-account-for-your-it-supplier/
SIMULATION -
Please wait while the virtual machine loads. Once loaded, you may proceed to the lab section. This may take a few minutes, and the wait time will not be deducted from your overall test time.
When the Next button is available, click it to access the lab section. In this section, you will perform a set of tasks in a live environment. While most functionality will be available to you as it would be in a live environment, some functionality (e.g., copy and paste, ability to navigate to external websites) will not be possible by design.
Scoring is based on the outcome of performing the tasks stated in the lab. In other words, it doesn't matter how you accomplish the task, if you successfully perform it, you will earn credit for that task.
Labs are not timed separately, and this exam may have more than one lab that you must complete. You can use as much time as you would like to complete each lab. But, you should manage your time appropriately to ensure that you are able to complete the lab(s) and all other sections of the exam in the time provided.
Please note that once you submit your work by clicking the Next button within a lab, you will NOT be able to return to the lab.
Use the following login credentials as needed:
To enter your username, place your cursor in the Sign in box and click on the username below.
To enter your password, place your cursor in the Enter password box and click on the password below.
Microsoft 365 Username: [email protected]
Microsoft 365 Password: xxxxxx -
If the Microsoft 365 portal does not load successfully in the browser, press CTRL-K to reload the portal in a new browser tab.
The following information is for technical support purposes only.
Lab Instance: XXXXXX -
You need to ensure that a user named Miriam Graham has the required rights to create new recipients by using the Exchange Online admin center. Miriam must be prevented from managing recipients. The solution must use the principle of least privilege.
To complete this task, sign in to the Microsoft 365 admin center.
Answer:
See explanation below.
1. From the Microsoft 365 admin center dashboard, go to Admin > Exchange.
2. In the Exchange admin center, go to Roles > Admin roles, select the Recipient Management role group.
3. In Assigned section, add Miriam Graham to the role group.
4. When you're finished, click Save.
Reference:
https://docs.microsoft.com/en-us/exchange/permissions-exo/role-groups https://docs.microsoft.com/en-us/exchange/permissions-exo/permissions-exo
HOTSPOT -
You have a Microsoft Exchange Server 2019 hybrid deployment.
You run the following command.
New-AddressList `"Name `List1` `" RecipientFilter {(RecipientType `"eq 'UserMailbox') -and (Title -like '*Sales*' -or Title
-like '*Marketing*') -and (CountryOrRegion -eq 'Canada' -or CountryOrRegion -eq 'Mexico')}
You have the users shown in the following table.
You have the shared mailboxes shown in the following table.
For each of the following statements, select Yes if the statement is true. Otherwise, select No.
NOTE: Each correct selection is worth one point.
Hot Area: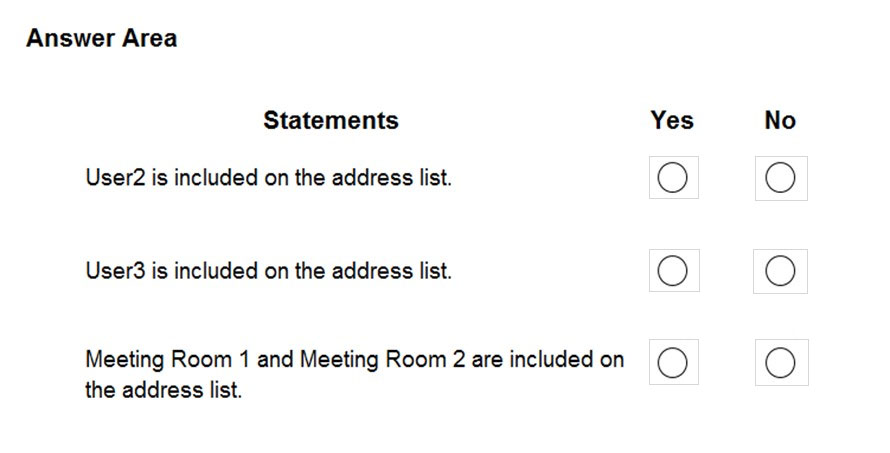
Answer:
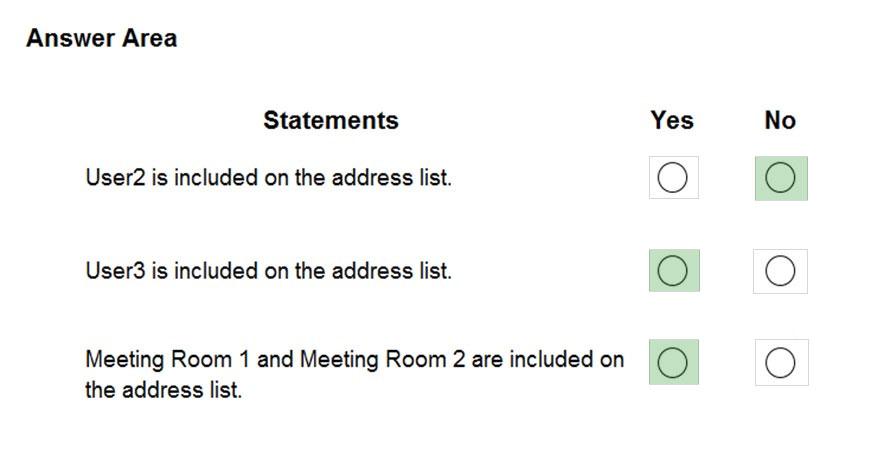
Box 1: No -
User2 is from France. Only users from Canada or Mexico are included.
Note: Use the New-AddressList cmdlet to create address lists and apply them to recipients.
To create flexible filters that use any available recipient property and that aren't subject to these limitations, you can use the RecipientFilter parameter to create an
OPath filter.
Box 2: Yes -
Marketing is in the Title and User3 is from Canada.
Box 3: Yes -
Meeting Room 1 has Sales in the Title and Country is Canada.
Meeting Room 2 has Marketing in the Title and Country is Mexico.
Reference:
https://docs.microsoft.com/en-us/powershell/module/exchange/new-addresslist
You have a Microsoft 365 subscription that contains a sensitivity label named Confidential and a data loss prevention (DLP) policy named Policy1. Policy1 contains a rule named Rule1. Policy1 is applied to the Exchange email location. Rule1 is configured as shown in the following table.
You need to ensure that when a user applies the Confidential sensitivity label to an email and sends the email to an external recipient, the message is forwarded to the user's manager for approval.
What should you do?
Answer:
C
Data loss prevention (DLP) helps you prevent the unintentional or accidental sharing of sensitive information.
DLP examines email messages and files for sensitive information, like a credit card number. Using DLP you can detect sensitive information, and take action.
When editing a rule within a DLP policy, you can change:
* The actions that are taken, such as restricting access to the content.
* Etc.
Actions included in the DLP policy tips: Forward the message for approval to sender's manager.
Reference:
https://docs.microsoft.com/en-us/microsoft-365/compliance/dlp-policy-reference https://docs.microsoft.com/en-us/microsoft-365/compliance/dlp-policy-tips-reference
DRAG DROP -
You have a Microsoft Exchange Online tenant.
You deploy a new management computer.
You need to use PowerShell to run Exchange Online cmdlets on the new computer.
Which four cmdlets should you run in sequence to connect to Exchange Online? To answer, move the appropriate cmdlets from the list of cmdlets to the answer area and arrange them in the correct order.
Select and Place: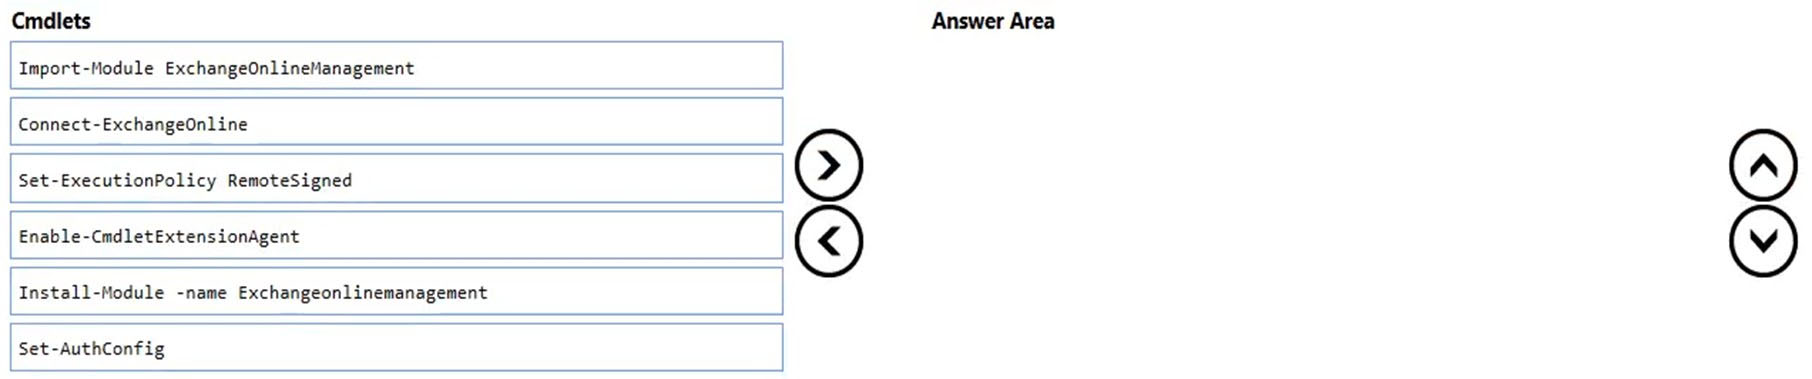
Answer:
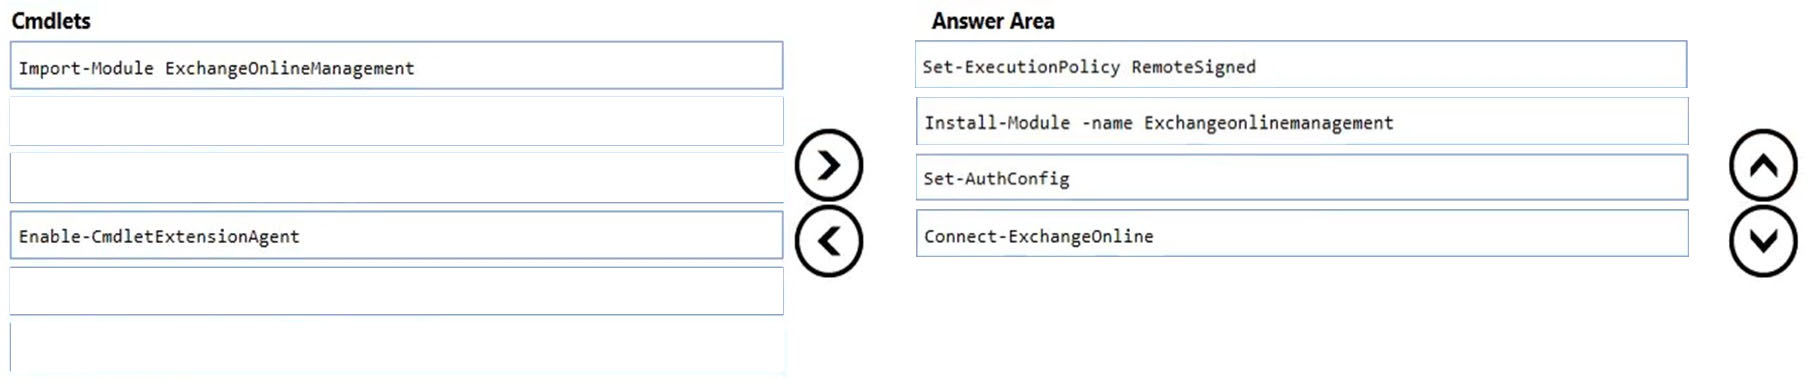
Step 1: Set-ExecutionPolicy RemoteSigned
You only need to set this once per computer. If haven't set the execution policy and try to connect to Exchange Online you will get an error:
Files cannot be loaded because running scripts is disabled on this system. Provide a valid certificate with which to sign the files.
To manage Exchange Online, the local execution policy for PowerShell must be set to RemoteSigned instead of Restricted.
Step 2: Import-Module -name ExchangeOnlineManagement
In a PowerShell window, load the EXO V2 module by running the following command:
Import-Module -name ExchangeOnlineManagement
-Name
Specifies the names of the modules to import.
Step 3: Set-AuthConfig -
Use the Set-AuthConfig cmdlet to modify the authorization configuration for your Exchange organization.
The Set-AuthConfig parameter defines Microsoft Exchange as a partner application for server-to-server authentication with other partner applications such as
Microsoft SharePoint 2013 and Microsoft Lync 2013 or Skype for Business Server 2015, including the certificate used for signing tokens. It's generally not required for this configuration to be modified except in some cases where you must use a different certificate instead of the self-signed certificate created by Exchange
Setup or to use a new certificate after the old one has expired.
Step 4: Connect-ExchangeOnline -
This example connects to Exchange Online PowerShell in a Microsoft 365 or Microsoft 365 GCC organization:
Connect-ExchangeOnline -UserPrincipalName [email protected]
Incorrect:
* Import-Module ExchangeOnlineManagement
Need to use the -name parameter.
* Enable-CmdletExtensionAgent
Cmdlet extension agents are used by Exchange cmdlets in Exchange Server 2010 and later. Cmdlets provided by other Microsoft or third-party products can't use cmdlet extension agents.
When you enable a cmdlet extension agent, the agent is run on every Exchange server in the organization. When an agent is enabled, it's made available to cmdlets that can then use the agent to perform additional operations.
Reference:
https://docs.microsoft.com/en-us/powershell/exchange/connect-to-exchange-online-powershell?view=exchange-ps https://lazyadmin.nl/powershell/connect-to-exchange-online-powershell/